Friday, January 05, 2007

Almost Pickup-less Log Cabin Tutorial

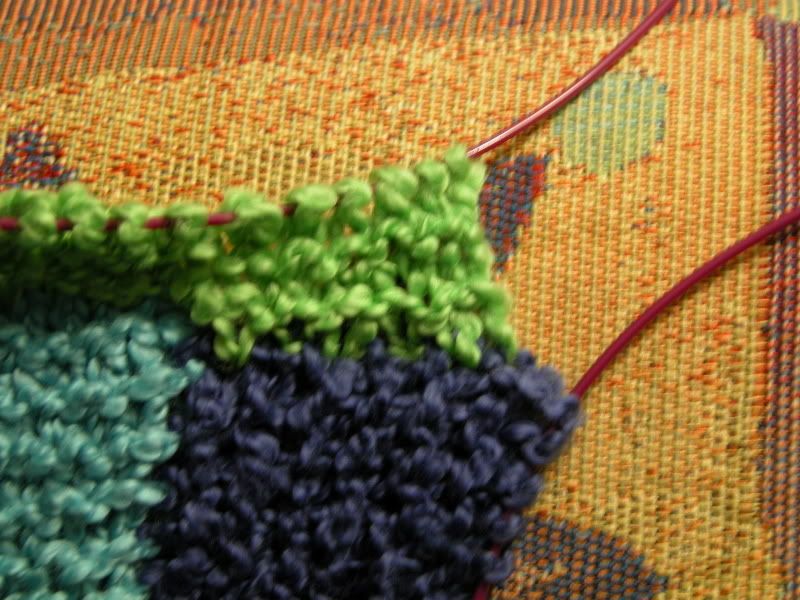
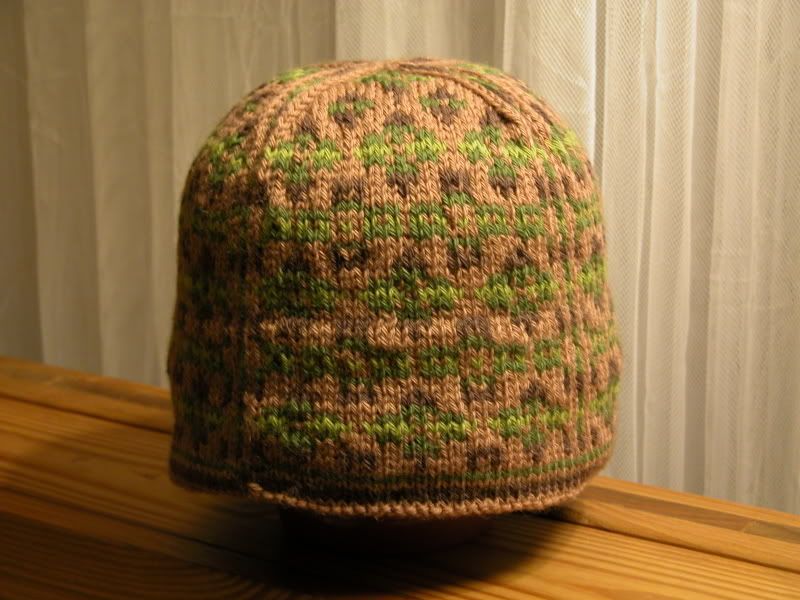
So, like I said, I hate picking up stitches. OK, "hate" may be a little strong, but I really don't enjoy it. And when there is as much in a project as in a log cabin blanket, well, I was going to figure out an alternative.

To start the blanket, follow the instructions as given here, on Mason-Dixon Knitting (or in their awesome book) and knit your center patch. DO NOT bind off the center patch - leave the stitches on the cable of your circular needle, and continue on to the first strip, picking up one stitch for each garter ridge along the side as described in the instructions. (Particularly for the floofy Crayon yarn, I am slipping the first stitch of every row on the strips to make picking up easier later. Yes, there will be a little bit of picking up. It can't be fully avoided.)

Once you work the number of ridges you want for the strip, work a right-side row (this would be your bindoff on the original method), turn and pick up in each garter ridge across the end of the strip and in each stitch of the cast-on edge of the center, and continue making strips on the next two sides of the center, finishing each strip with a right-side row and leaving the live stitches on the needle.

You should have reached the top of your center patch, and have live stitches ready to go on your needle. When you have one stitch left on that last row, pick up the yarn for the next strip.


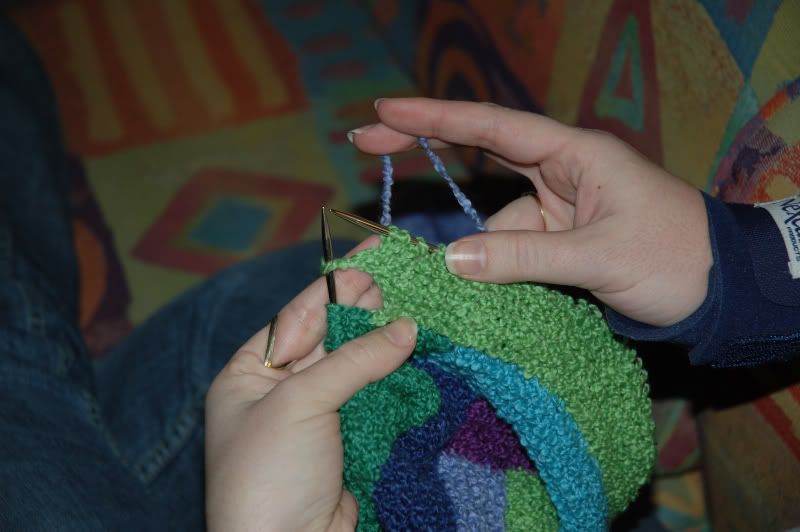
Work the last stitch of the row in the color of the next strip (light purple) - this will become the first stitch of that strip.


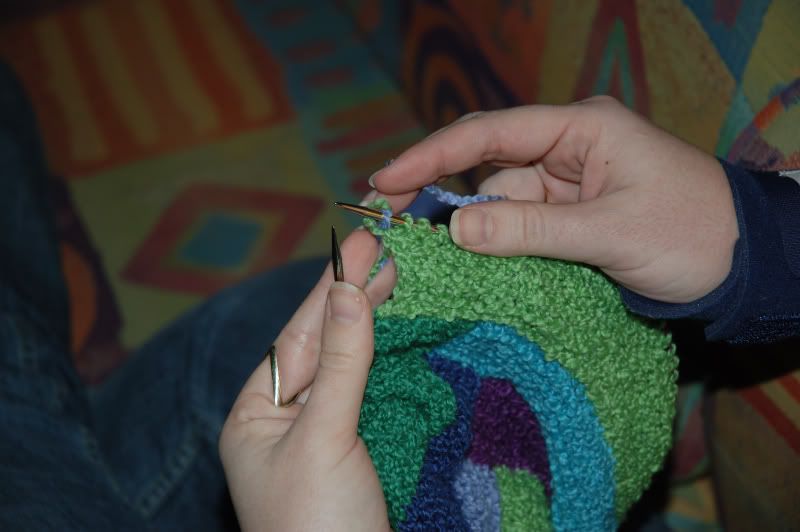
Pick up one stitch in each garter ridge (first stitch counts for that first ridge) across the end of the strip (light green), (I have 6 ridges, the MDK pattern uses 9) and then work across the live stitches on your needle (dark green).


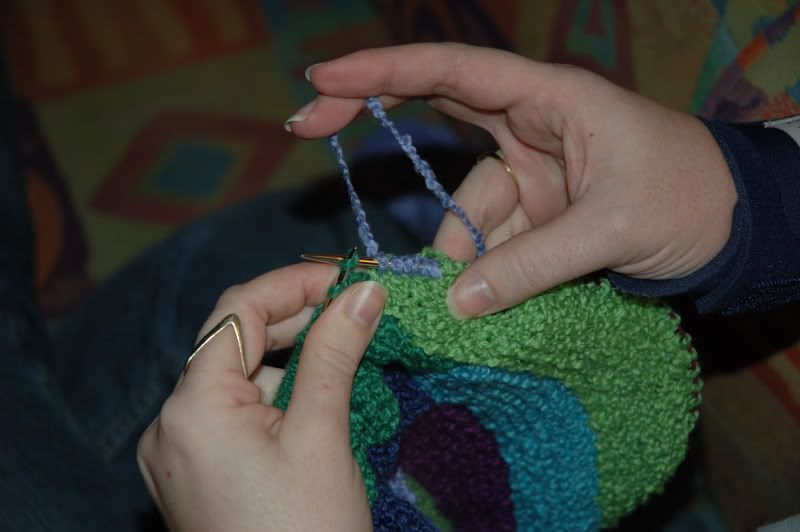
When you reach the end of your live stitches,


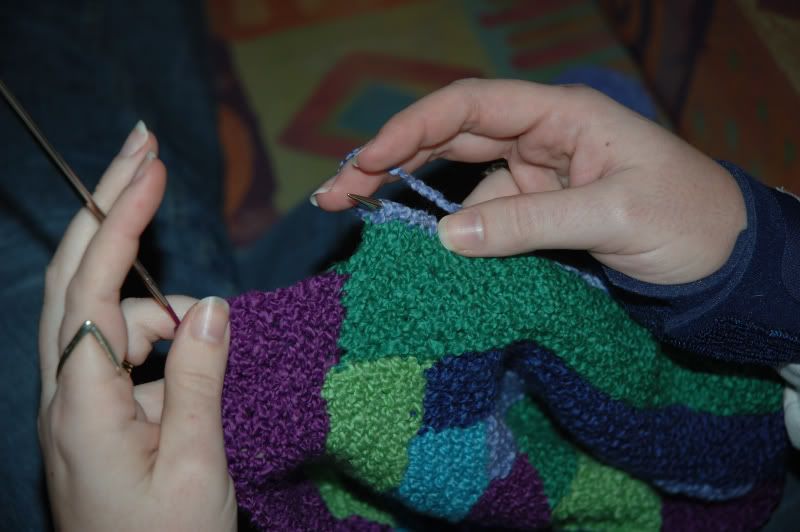
Pick up a stitch in the top of the strip immediately below (dark green)- this makes up for the final stitch of it that "turned the corner" and became part of the next strip (dark purple)


And then pick up one stitch in each garter ridge of the edge strip (dark purple).

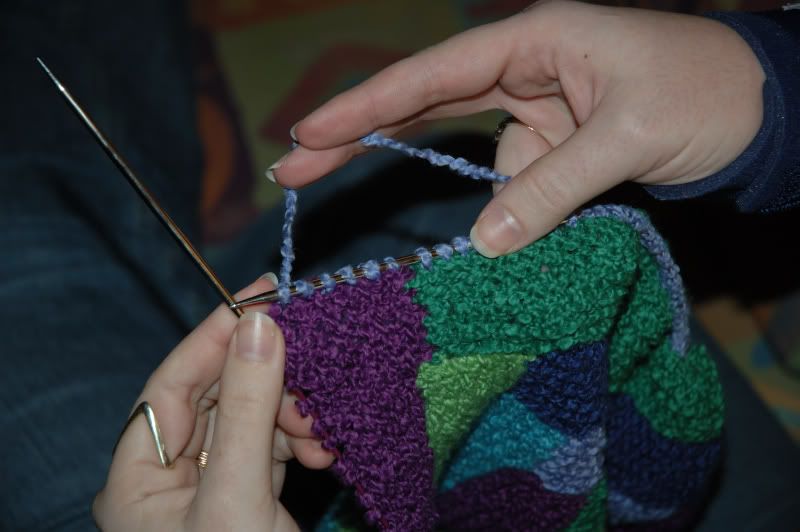
Now you should be ready to turn and work back (slipping the first stitch if you choose).

Voila! Almost pickup-less log cabinning!

Big thank-you to Kris for taking pictures for me!

Speaking of, Bezzie - re: the yarn pr0n - that's all Kris's doing with his camera and macro lens. He likes to work with a very narrow depth of field, which means that only what is in that narrow plane is in focus, and everything in front or behind is nice and fuzzy.

Oh, and Lila? Just because that hat was for Tom doesn't mean you couldn't bargain your way to one of your own at some point. ;)

Labels:

Thursday, January 04, 2007

New Year, New Project!

So, as we were packing to leave Pittsburgh after Christmas, Kris got a call on his cellphone that our friends Ed and Karin had become parents! Their little guy was born on the 26th. We haven't been able to meet him yet, since we had to get back for Kris to be at work on the 27th, but I did start a little project to take up to him:

A log cabin baby blanket in Knit Picks Crayon in Lime, Periwinkle, Azure, Green, Blue, and Purple. Why that color combo? Because it is going to go with a trio of dragons! Specifically, Knitty.com's Norberta, one each in the greens, the blues, and the purples. See, Kris and Ed used to play D&D together in college, and even once we moved up here (before Ed and Karin moved to Pittsburgh), we would play. My feeling is that we need to encourage the geekitude in the next generation as soon as possible. So, the little guy is getting an emerald, a sapphire, and an amethyst dragon to snuggle with, and a matching blanket. :D

I played a little with the basic log cabin premise from Mason-Dixon Knitting. In that book, they tell you to cast on, knit the center, bind off, and then pick up for the first band, knit it, and bind off.. and so on. Well, I hate picking up stitches with a fiery passion, and they are doubly a PITA with a floofy yarn like Crayon (which is soft and snuggly and will make a great blanket). So, I thought about it, and it ocurred to me that it was a little silly to bind off stitches just to pick them back up again. So, I tried something. When I finished a band, instead of binding off on the right side, I just knit across that row and turned my work to the right. I picked up the stitches in the end of the band I just completed, and then just knit across the live stitches on that next side, which I had held from the previous band on that side. You can sort of see what I mean here:

It does require a really long circular needle (possibly two, eventually), but I think it makes the log-cabinning go a bit faster. Plus, there are no lumps on the back from picking up stitches, and you don't need to even attempt to find the stitches in the bindoff to keep your count consistent!

I suddenly realize that I'm possibly not explaining this all that well. If anyone is curious and wants a better explanation, let me know, and I'll enlist the photographer (aka Kris) to help me put one together this weekend.

I finished my version of the Red Light Special hat that I mentioned in the post about Kris's. I love this pattern - I did almost the entire thing on Jan 1 and 2. (And no griping - I was pretty much on the couch all day after a very long New Year's Eve. And no, I wasn't hung over...)

Here it is blocking on my patented upside-down-mixing-bowl-balanced-on-bottle hat blocker. I should really find an easier way... I call it my "Swamp Thing" hat, because although I love the colors and am very happy with how it came out, that is the only thing I can think of when I look at it.

Oh, and you know how everyone seems to be posting their New Year's Resolutions? I'm not. Not only am I not posting them, I'm not making them. I've realized something in the last year or so - the best way to guarantee that I will do something is to tell me that I can't, and the best way to guarantee that I won't is to tell me that I have to. (That noise you hear would be my father falling out of his chair laughing. I'm pretty sure he and Mom figured that out YEARS ago) So, I'm not doing it. I'm not telling myself that I can't buy yarn until such-and-such date, and I'm not telling myself that I will lose X pounds by summer. I am considering this 100 miles by April 1st thing, though. Mostly because I have doubts that I can do it, which pushes me to want to prove myself wrong. And yes, I know that I am a sick, twisted woman who clearly needs help. :) The debate is, of course, treadmill or stationary bike. I did 500 miles on the bike in 2005, but I'd like to push myself beyond that. And 100 miles by April 1 is just barely over a mile a day. I should be able to walk that. Hmm... Food for thought, anyway.

Note to anyone who reads this via Bloglines - you might want to check to see if you have the "Updated Items" option set to "Ignore", or every time I update the "Finished Objects" or "Planned Projects" posts, they are going to show up as new. And I don't want to annoy anyone.

Labels: , , ,

Thursday, March 16, 2006

Socks on 2 Circs

Wow - I had no idea so many people were interested in the socks on 2 circs method. I learned the basic concept of using 2 circs from (not shockingly) Socks Soar on 2 Circular Needles by Cat Bordhi. I figured out the 2-at-once part from the Straight-Laced Socks pattern from knitty.com.

When adapting this method for the Jaywalkers, my socks are arranged on the circs so that circ # 1 (when facing me) has, from right to left, the stitches from sock1, needle 4 (as denoted in the pattern), a marker, sock 1, needle 1 (using one ball of yarn) and then sock 2, needle 4, a marker, and sock 2, needle 1. The second circ holds the stitches from the second and third needles for both socks. I arranged them that way because the stitches on needles 1 and 4 will become the heel, so they need to be on the same circ. I cast on all the stitches for the first sock on one circ, and worked the first row of ribbing flat, and then did the same on the other circ for the other sock. Then there was a lot of slipping stitches to get them all on the right circs. In retrospect, it probably would have been easier to just cast them on and split the stitches in half between the circs, and then worry about "naming" them according to which needle they should be on. I'm a little too anal-retentive for that, apparently. So, yes, this means that when I am working on the actual zigzag pattern, the stitches on the first circ are on different rows. It's making me a little crazy, though, so I might grab some dpns and rearrange them so that they are split a little more logically.

Does this make any sense, or am I babbling gibberish again?

zib - The smiley was a total accident, although I did notice it after I took the picture.

turtlegirl - I am very glad that you were able to find those padded crochet hooks easily. I've been considering trying them, mostly because I get a sore spot on the side of my hand where the hook rubs. It's kind of annoying. =)

Oh, and the crocheted bolero is finished. I finished it up last night have it pinned out on the blocking board today. I'm quite happy with how it turned out. Again, modeled pics as soon as I can get hubby to take some. (I see a picture-heavy post in my future to catch up on all these promises.)

And just because this stitch pattern is really neat, a closeup.


ETA: The Bloom shawl, by our newly blooming rhododendron!

Labels: ,